-40%
13 14 15 16 HD Caravan Town Country Routan Jeep VES Monitor Repair DIY
$ 10.55
- Description
- Size Guide
Description
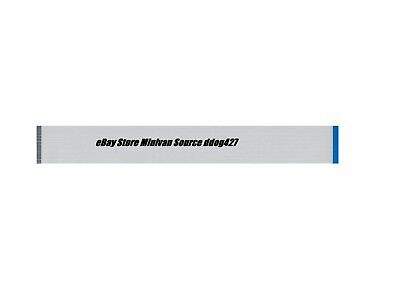
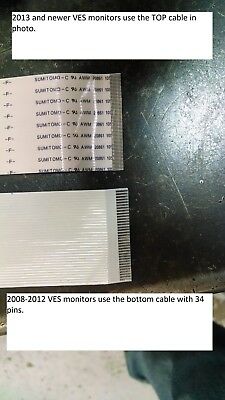
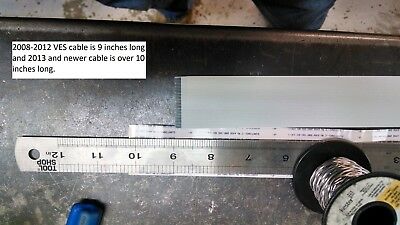
ATTENTION- THIS LISTING IS FOR THE 2013- newer HD MONITORS WITH EITHER THE TWO CABLES INSIDE OR THE SINGLE CABLE WITH 68 PINS. THESE NEW HD CABLES ARE LONGER AND HAVE THE CORRECT LENGTH AND WIDTH TO REPAIR THE HD MONITOR.*IMPORTANT INSTALLATION NOTE*
2013 AND NEWER HD CABLE MUST BE INSTALLED SILVER SIDE DOWN
(08-12 REGULAR DEFINITION CABLE IS INSTALLED SILVER SIDE UP)
I have been repairing the Chrysler VES monitors since 2013 and my repair video, "
Town and Country Grand Caravan Volkswagen Routan Monitor Fix VES 2008",
has been viewed more than 54,000 times! I have also personally repaired hundreds of these monitors and can answer any questions you might have regarding this repair.
This auction is for ONE correct length cable. This price includes the cable and secure packaging.
Plus FREE shipping via USPS First Class Mail. I ship same or next day so that you get your cable quickly, if you would like expedited shipping I do offer Priority and Priority Express at additional charge.
These new ribbon cables are the most flexible, highest quality FFC (flexible flat cable) available. This cable is custom manufactured to my specifications and is the highest quality available.
Does your 2013 or newer Chrysler Town and Country, Aspen, 300, Dodge Grand Caravan, Durango, Jeep vehicles, Volkswagen Routan or many other Chrysler products built since 2013 have the optional Vehicle Entertainment System, also known as VES? If it does and your 2nd row screen is black while your 3rd row screen just shows a split screen without a signal, then your van most likely has the cracked ribbon cable problem.
I have repaired many vans, SUVs, and cars that have this problem with this cable. A few simple hand tools and an hour of your time is all that is needed to save hundreds in repair costs.
Repairs Chrysler, Jeep, Dodge, and Volkswagen vehicles with Factory installed Chrysler VES.
Factory ribbon cable usually has markings of
SUMITOMO-C AWM 20861 105C 60V VW-1
Other repair options:
A) The typical trip to the dealer for repair is diagnosed as "replace monitor module", prices range from 0-00 and if you want to replace the monitor yourself the cost the monitor is list price 0-700, wholesale is 5!
Factory part numbers: P1WH73HDAAB, Many more
B) Purchase a used monitor from a salvage yard that may last a day, or a month, or years. There is no way of knowing. Prices range from 0 to 0.
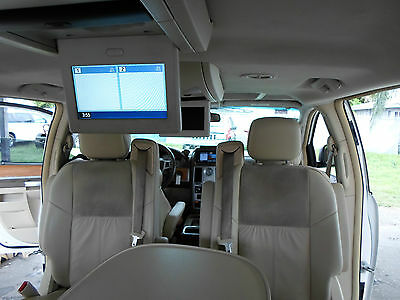
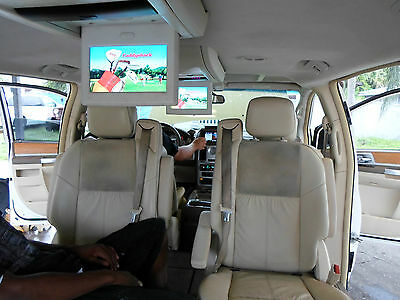
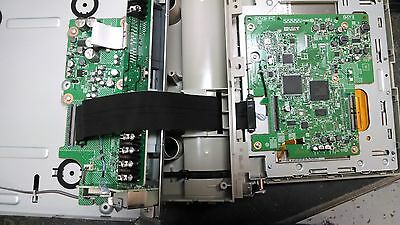
Clearly the logical choice are these new ribbon cables. These cables are more flexible and EXACTLY THE SAME LENGTH as the factory cable and should prevent the cracking problem that is the root cause of these VES problems. The picture above shows how small the crack in the cable is, however, that is all that is needed to break communication with the dash DVD player and cause the second row to go blank and third row to show blank split screen. The pictures above are from an actual repair, first picture shows the 2nd row screen black and 3rd row screen displaying split screen without a signal. Other picture shows repaired, working monitors in all rows. I have repaired dozens of vans equipped with the 2013 and newer VES with this cable. If both of your screens are black that means both of your ribbon cables are cracked, in order to repair both screens you will have to purchase two cables. I combine shipping on all orders, I will ship as many cables as you need for flat shipping price.
I pack and ship securely,
in boxes to prevent shipping damage
, every morning except Sunday ensuring your items are received as quickly as possible.
FREE shipping is USPS First Class Mail
Installation Instructions
For detailed installation instructions simply request them when you place your order and I will email them to your PayPal email address
Install tips:
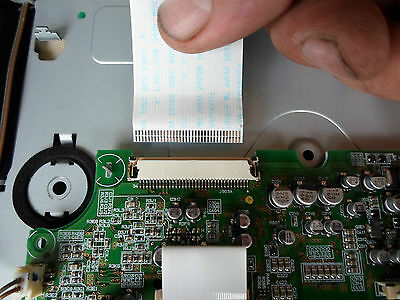
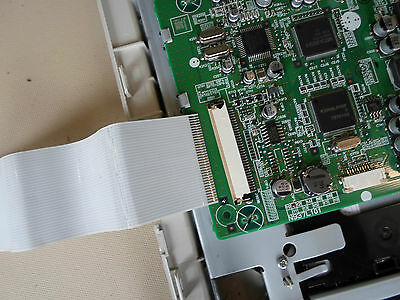
ZIF connectors- make sure the cable is seated squarely and both latches are closed. Just hold cable lightly while pushing latches closed at same time.
Whether your overhead console is a one piece unit or two, they all mount to ceiling the same way: There are two screws at each end of overhead console unit, under a plastic cover, one is a 10mm bolt head and one is a Phillips screwdriver head. Once these are out the only thing holding it up against the ceiling are the plastic push pins, just pull straight to release them.
